Donnerstag, 30. Juli 2020
Emulsion making 101 (part II): improving the stability
I hope you have enjoyed the first post of these series in which we made a KISS and simple emulsion.
That emulsion has a nice and light skin feel with a lovely texture and will remain stable for months at room temperature. The problem is, such an emulsion can not tolerate temperature and pressure fluctuations. This means, if you ship the emulsion from one part of the world to the other part or even if the temperature rises in your flat or you accidentally forget your emulsion in your car during a hot summer day, the emulsion will break and separate.
One of the easiest and most effective ways to improve the stability of an O/W emulsion is to increase the viscosity of the water phase. Mainstream industry has been using synthetic polymers such as carbomers in emulsion making for decades. During the last years and with the increasing demand for "natural" ingredients, even the mainstrem is attracted to "natural" gums as an alternative for synthetic viscosity modifiers and stabilizers.
Follow these links of you want to go back to our previous posts about "natural gums" before proceeding with this post:
What you need to know about natural gums (part I)
What you need to know about natural gums (part II): Gum blending
Natural gums have a long history in the food and beverage industry and some of them are being used since an eternity in food to change the texture, enhance the flavour and the taste, improve the thermal stability etc. and most of our knowledge (and the best books and articles) about natural gums is related to the food industry.
There is a huge variety of natural gums and gum blends available and which one you choose to use depends on many factors such as:
- the product
- the packaging
- the purpose and application mode
- manufacturing method
- individual ingredients
- and of course the price and availability
as always, there is no one-size-fits-all solution. The one gum that may work excellent in a certain emulsion with a certain group of ingredients might not be suitable if you change the emulsifier or the packaging from a tube to a jar or try to modify the manufacturing process.
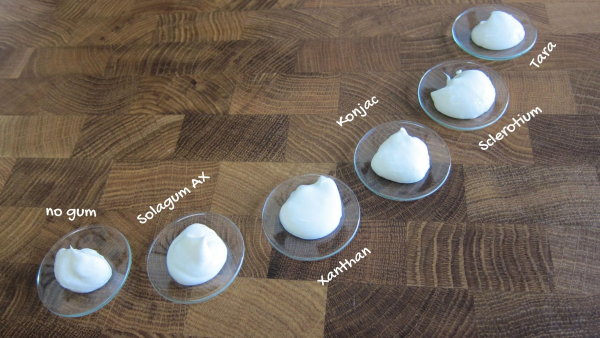
To study the difference in texture and stability, I have tested 5 different gums in this simple emulsion formulation and the detailed results will be available within a few weeks to our members.
For this tutorial and video, I'm using Solagum AX which is a commercial blend of acacia and xanthan gum and is an easy to work gum that will cover many of a cosmetic formulator's requirements.
Depending on your batch size and equipment, you may use different methods for adding a gum to your product
(watch this video about 5 different ways to add a gum to your products). For this tutorial I'm using the most common and classic way of gum application. This means I add the gum to the water phase at room temperature with an overhead stirrer, let the gum hydrate for about 30 minutes and then proceed with the emulsion making via a hot process.
This is my formulation which is almost identical to the first formulation except for the added gum:
| Phase A | |
| Distilled water | to 100,0% |
| Natural chelator PA-3 | 0,1% |
| Panthenol | 1,0% |
| Skin prebiotic | 3,0% |
| L-Arginine | 0,2% |
| Phase B | |
| Solagum AX | 0,3% |
| Phase C | |
| Plantasens HE20 | 5,0% |
| Moringa oil | 20,0% |
| Natural tocopherols | 0,3% |
| Phase C | |
| Versatile preservative TBG | 1,0% |
| Lactic acid | to adjust the pH |
Procedure:
1- Measure phase A and C in two separate heatproof containers. Phase A needs a little bit of stirring before heating
2- Disperse the gum in water phase @RT and let it hydrate for about 30 minutes
3- Heat phase (A+B) and C in a water bath between 75-80 C
4- When both phases have reached the temperature and the oil phase is completely melted and homogeneous stop heating and add the oil phase to the water phase.
5- Homogenize for a while and then start stirring while the emulsion cools down.
6- After the emulsion has reached RT, prepare a 10% dilution and measure the pH. By adding arginine we have increased the pH deliberately. In our case the pH was around 8,6 and that's OK because our preservative reduces the pH.
7- Add the preservative, prepare another 10% dilution and remeasure the pH. In our case the pH was 6,4 and we used just a little bit of lactic acid (1 drop 80% for a 100 gr batch) to bring the pH to 5,36 (we don't show this part in video, don't get confused).
8- Take your micro kit and stability samples and fill the rest in a suitable container
Watch this video for a short tutorial.
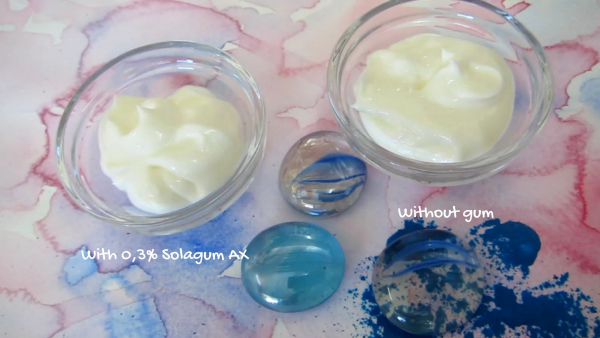
Here an excellent shot from both samples after about 1 month storage @RT.
You can identify that the sample with the gum has a smoother and more uniform texture


